Kickstart Data Science Locally: From Zero to Jupyter in 5 Steps
Ready to dive into Data Science/Engineering but not sure where to begin? You want to start your new Data Analysis project as soon as possible but do not have the tools to do so yet? You are not sure where and how to start? Well, in this article I explain what you should always have in your local machine as you start on your Data Science journey. This setup will enable you to get started quickly and showcase your progress effectively.
Anaconda vs MiniConda: Which Should You Choose?
Both Anaconda and Miniconda are distributions of the Conda package and environment management system, but they differ in scope and size.
Anaconda includes a fully-featured distribution, comes with hundreds of pre-installed data science libraries such as NumPy, pandas, matplotlib, scikit-learn, Jupyter Notebook, and more. You might not need most of them so you can add them later.
MiniConda is the way to go for quick setup. It is a minimal installation of Conda, without any pre-installed libraries except Python. You can add only the libraries you need later.
| Features | Anaconda | Miniconda |
|---|---|---|
| Size | Large installation size (~3 GB) | Lightweight (~100 MB), faster to install. |
| Pre-installed Libraries | Yes (over 250) | No (minimal setup) |
| Best For | Beginners or those who want all tools pre-installed | Advanced users and minimalists alike |
Prerequisite
- A Windows/Mac/Linux machine
- Internet connection
- Admin rights
Installation
Go to the Miniconda installation page and follow along the steps.
Verify your installation
Now open the terminal or cmd and check if the installation was completed correctly by adding this command. Verify that you have the latest.
conda --version
Now the fun part: creating your developer environments and installing packages
On terminal go the folder where you will store your Data Science or Engineering project and type the below commands.
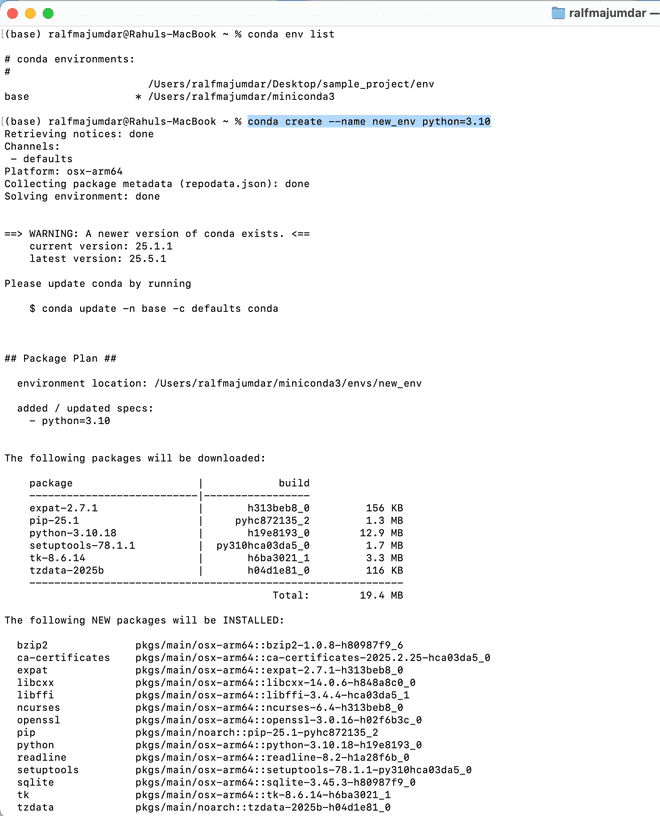
conda env list
conda create --name [instert_name] python=3.10
You will notice that there is a base environment. This is where all the base conda packages are installed. However, we do not want to use this environment, instead we want to keep separate sandboxed environments for all our projects. Using the second line we create the new environment. You will be prompted to install the base set of packages, type 'Y' and let the installation get completed.
Now switch to the new environement using the code below
conda activate 
Now that you have created a new Data Science/Engineering environement you can now install packages directly here as shown below.
conda install numpy pandas jupyter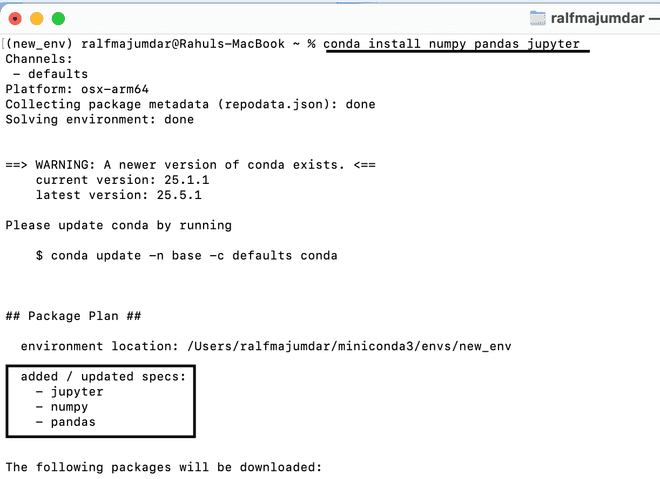
Now let's run Jupyter
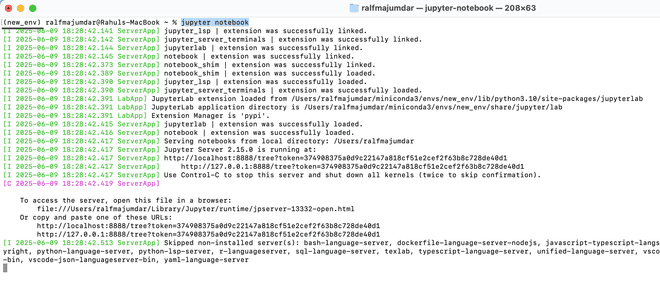
Now we will open Jupyter and see if our development environment is good to go. Ensure that you are in the desired Conda environment and type the below command in the terminal:
jupyter notebookYou will see initialization steps as below and soon you will see the browser open Jupyter Notebook.

Now you can upload data files using the Jupyter web interface, or can copy over the files to the env folder.
Summary
You are now all set. You have setup environments, installed packages, and installed Jupyter locally. You can create a new notebook and start your Data Science & Engineering journey.
Author:
Rahul Majumdar